Important:
Use these instructions along with the tool, parts page or manual.
Notice:
- Shut off air supply. Open 51665 ON/OFF Valve
to deplete air.
- Disconnect tool from air supply hose.
- Use 95731, 8 mm Wrench and 51694 Pin Wrench
to remove accessory from collet.
- Remove 51657 Collet Cap and insert.
If needed, use 96486 Collet Insert Removal Tool.
Disassembly:
Step 1
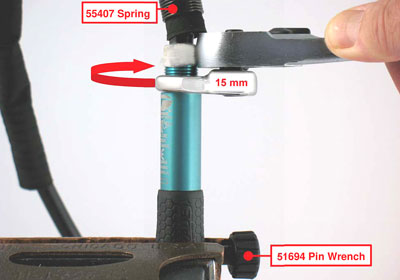
Insert 51694 Pin Wrench through housing and spindle. Fasten housing in vise with aluminum or bronze jaws, with hose end pointing up. Pull up on 55407 Spring Clamp to release overhose. Use a 15 mm or adjustable wrench to loosen 55405 Valve Lock.
Important:
Turn counterclockwise.
Step 2
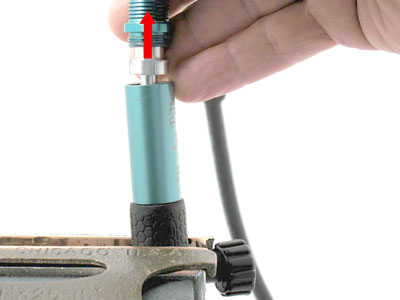
Remove 55419 Manifold Stem and hoses.
Important:
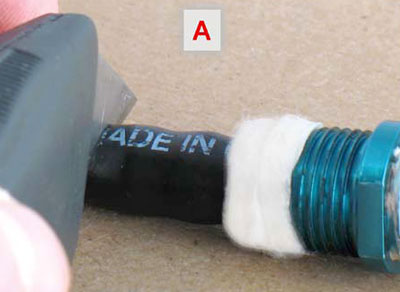
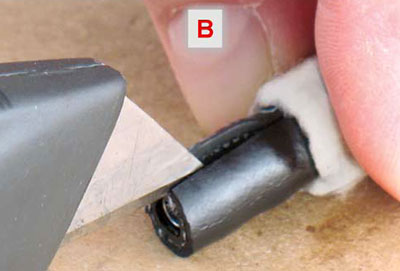
Push-Lock style air hose & fittings are used on this tool. To remove, cut hose as shown in photos: A & B.
Step 3
Use a pick to remove 55418 Muffler. Carefully remove housing from vise, and invert to remove 55402 Valve Seat, 55401 Rear Plate, 55400 Cylinder and 55404 Vanes.
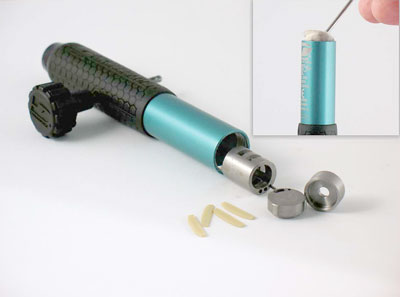
Important:
Notice inset photo above (top right).
Step 4
Fasten housing in vise with 55390 Collet Guard pointing up.
Use a 14 mm or adjustable wrench to remove 55390 Collet Guard.
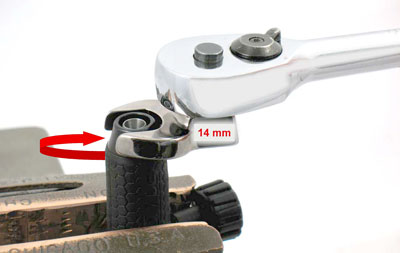
Important:
Turn counterclockwise.
Step 5
Use 96479 Retainer Wrench to remove 51548 Bearing Retainer. Remove 94984 Debris Eliminator.
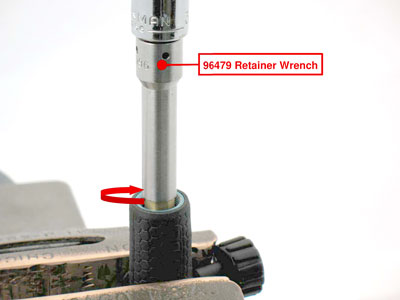
Important:
Turn counterclockwise
Step 6
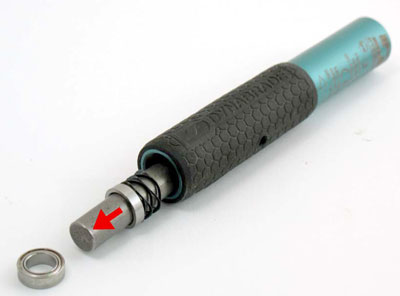
Remove 51694 Pin Wrench. Use a soft-faced hammer to bump 55392 Spindle and remove it from housing.
Step 7
Use 95890 Taper Pin, or a 9 mm (~.354") diameter rod, as a ram,
to remove 51544 Bearing, 55416 Spacer and 55394 Wave Spring.
Step 8
Hold 55398 Rotor in 96600 Rotor Clamp and fasten clamp in vise with 55392 Spindle pointing up. Use 96599 Spindle Wrench to remove spindle.
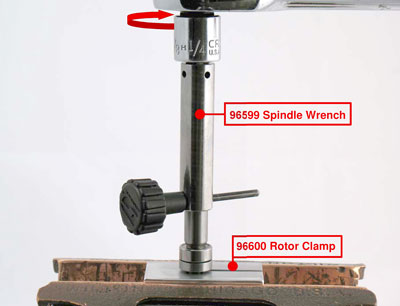
Important:
Turn counterclockwise.
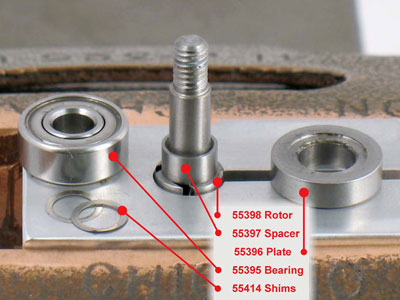
Step 9
Remove 55395 Bearing, 55414 Shims, 55396 Front Bearing Plate & 55397 Spacer.
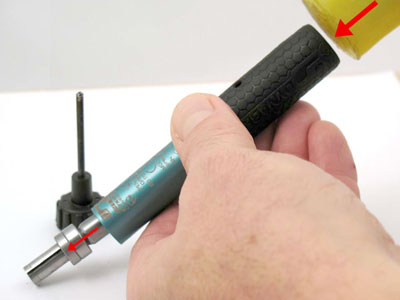
Step 10
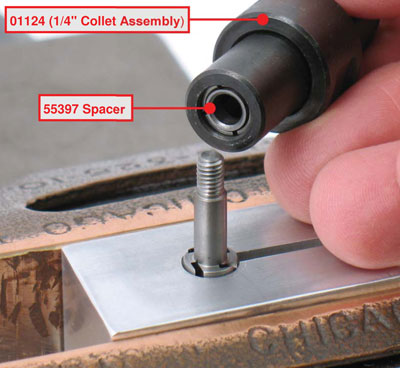
If 55397 Spacer is difficult to remove from rotor,
use a HEAT GUN to
warm and expand spacer.
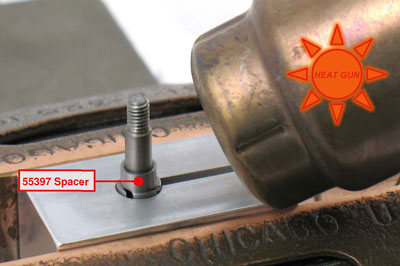
Use a 1/4" collet assembly (01124 shown in photo) to grab spacer and remove it without damage.
Disassembly Complete
Use tool parts page or manual to identify valve parts and order of disassembly.
Clean, inspect, and replace worn parts before assembling.