Assembly:
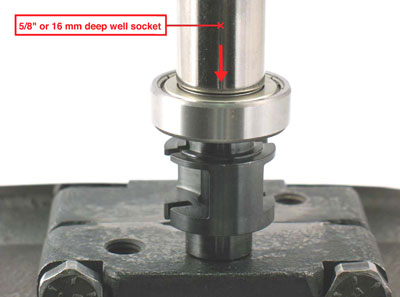
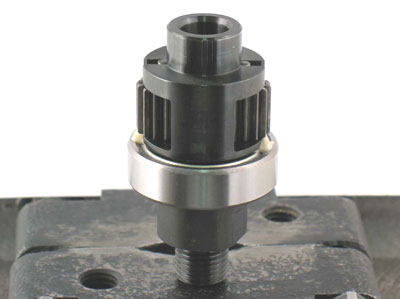
Step 1
Use 5/8" or 16 mm diameter deep well socket and the arbor press to install the 02552 Bearing onto the front of the
planetary carrier.
Step 2
Fasten the planetary carrier in the vise with aluminum or bronze jaws so that the spindle is pointing up. Apply a small amount of Loctite #271 or equivalent to the thread for the spindle nut.
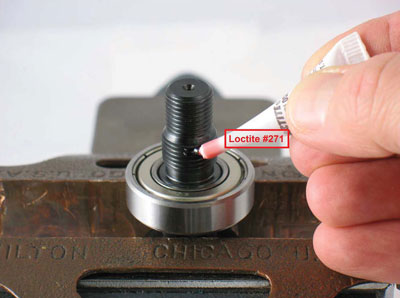
Install the 04032 Spindle Nut onto the planetary carrier. Use a 19 mm crowfoot and torque wrench to tighten the spindle nut.
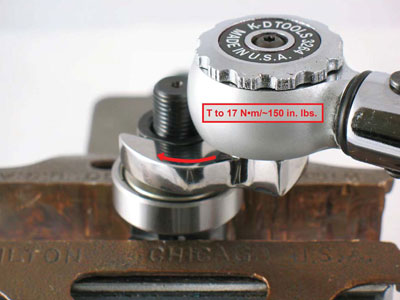
Important:
T to 17 N•m/~150 in. lbs.
Step 3
Apply the 95542 Grease or equivalent to the needle bearings in the planet gears.
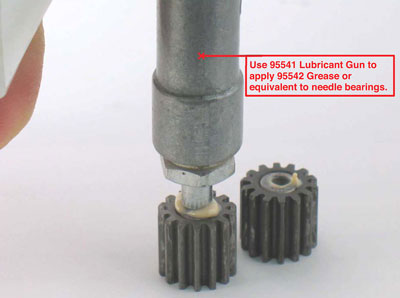
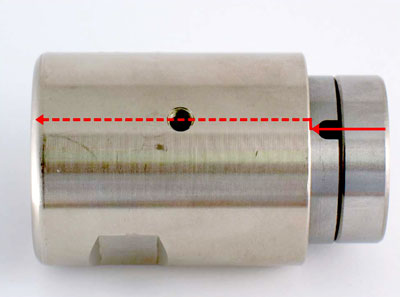
Install the planet gears and the 53182 Shafts into the carrier.
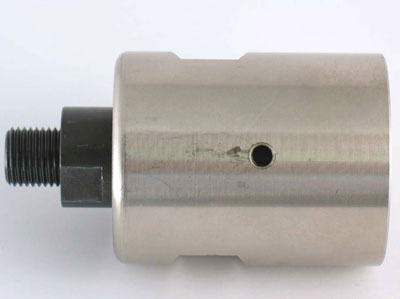
Install the ring gear so that the notches will line-up with the lubricant and set-screw holes in the planetary gear casing or planetary cover.
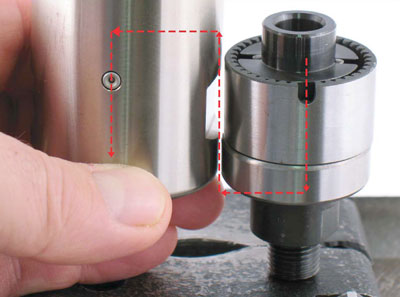
Step 4
Use 5/8" or 16 mm diameter deep well socket and the arbor press to install the 02552 Bearing onto the planetary carrier.
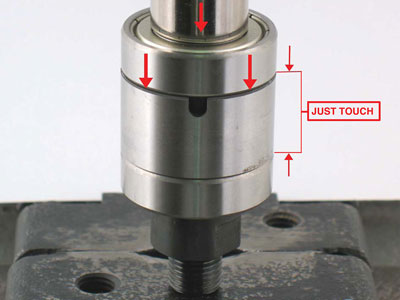
Important: Carefully press the bearing to just touch the ring gear. This will establish a close fit between the bearings and the ring gear.
Step 5
Install the planetary reduction into the planetary gear casing or planetary cover.
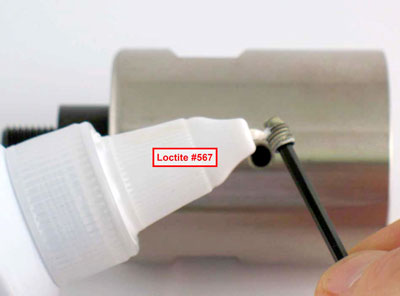
Apply Loctite #567 or equivalent to the 04014 Set-screw(s)
and install.
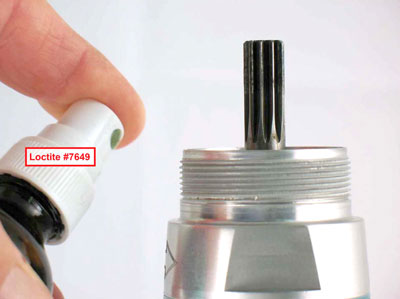
Step 6
Apply Loctite Primer #7649 or equivalent to the housing thread.
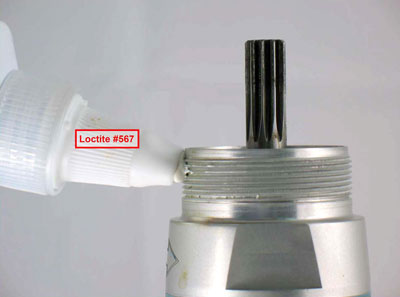
Apply a small amount of Loctite #567 or equivalent to
housing thread.
Step 7
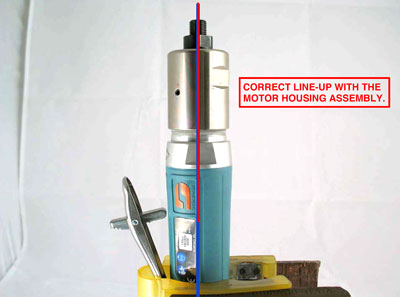
Use the 51989 Repair Collar to hold the motor assembly in a vise so that the opening of the housing is pointing up.

Important: Make sure that the planetary reduction assembly is in-line with the motor pinion gear.
Step 8
The planetary gear casing or planetary cover must thread straight onto the motor housing assembly.
Use a 1-9/16" crowfoot and torque wrench to tighten the
planetary gear casing or planetary cover.

Important:
T to 35 N•m/~300 in. lbs.
Step 9
Check and make sure that the spindle RPM is correct.
Planetary Gear Assembly Complete.
Install arbor and accessory.
Apply the information provided in these instruction to all straight-line, extension,and right angle planetary gear assemblies.
In addition, refer to the specific parts page or tool manual for each model and follow the exploded views.
Important: Use Disassembly and Assembly Instructions - 1 hp. Straight for repairing the air motor assembly.