Motor Disassembly:
Step 1
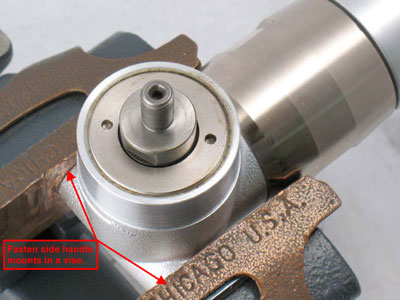
Fasten the side handle mounts on the 53600 Right Angle Housing, in a vise with aluminum or bronze jaws, so that the work spindle is pointing up.
Step 2
Use the 97782 Pin Wrench or an adjustable pin spanner to remove the 50963 Retainer.
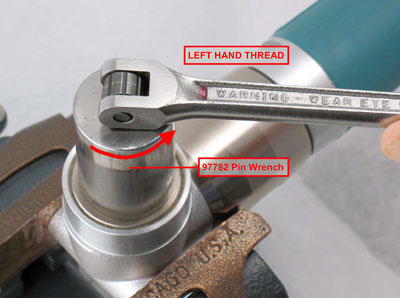
Important: Left Hand Thread
Turn counterclockwise
Step 3
Pull the spindle, bearing and gear assembly out of the housing.
Remove the seal, Shims and lubricant wick.

Step 4
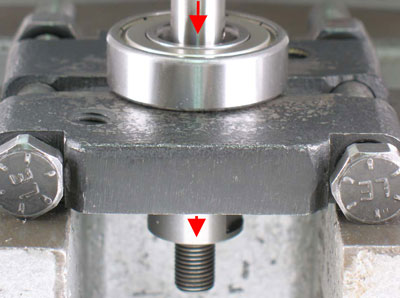
Fasten the 96346 Bearing Separator (2") between 97679 Bearing and spiral bevel gear. Place the bearing separator along with the spindle, bearing and gear assembly on the table of the 96232 Arbor Press (#2) so that the spindle thread is pointing down. Remove the gear from the spindle.

Remove the 97679 Bearing.
Step 5
Only remove the 96325 Bearing, and the 53649 Gear Oil Plate when the bearing needs to be replaced. Follow the instructions contained in the tool parts page or manual.
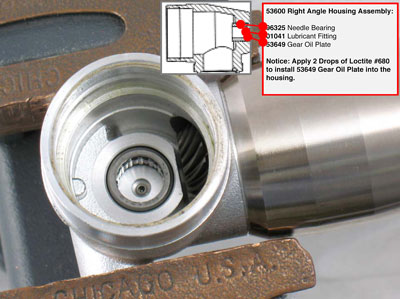
Important:
The 96325 Needle Bearing rarely requires replacement.
Step 6
Use a HEAT GUN to warm the 53650 Lock Ring and soften the thread sealant. Use a 45 mm (~1-25/32") crowfoot or an adjustable wrench to remove the lock ring.
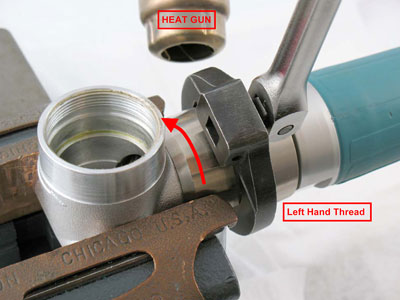
Important:
Left Hand Thread - Turn clockwise.
Step 7
Remove the 53651 Spacer. Remove the pinion gear, bearing and coupler from the housing.

Step 8
Fasten the 51969 Coupler Nut in the vise with aluminum or bronze jaws so that the pinion
gear is pointing up.
Use a 17 mm wrench to remove.
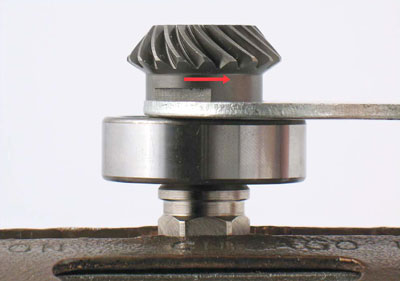
Important:
Turn counterclockwise.
Step 9
Use a 3/16" hex key to hold the 53635 Pinion Adapter stationary.
Use the 17 mm wrench to
remove pinion gear.
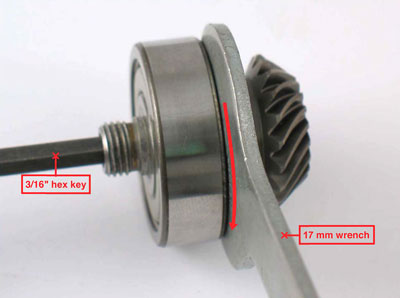
Important:
Turn counterclockwise
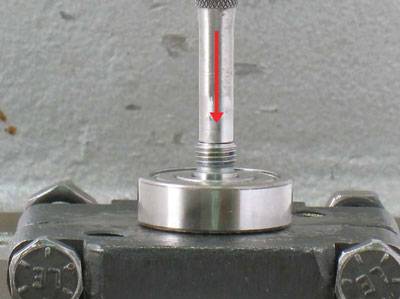
Step 10
Use the arbor press to push the 53635 Pinion Adapter from
the 01266 Bearing.
Disassembly Complete
Important:
Clean and inspect parts before assembly.