Motor Disassembly:
Step 1
Position the 51989 Repair Collar around the motor housing.
Fasten the tool in a vise so that the work spindle is pointing up.
Use a HEAT GUN to warm the 51947 Housing Cover and soften the thread adhesive.
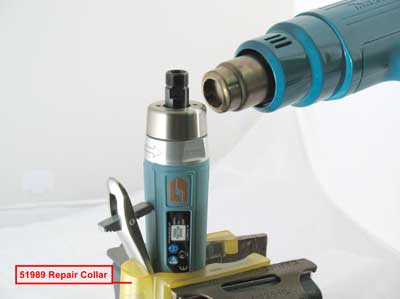
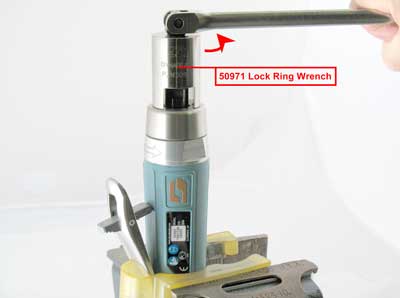
Use the 50971 Lock Ring Wrench or an adjustable pin wrench to remove the 51947 Housing Cover. Turn counterclockwise.
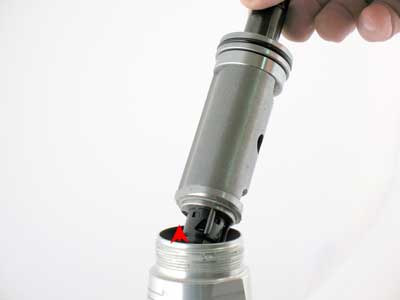
Step 2
Pull-up on the work spindle to remove the motor with the
96498 Wave Spring, and the 53620 Motor Adapter
from the housing.
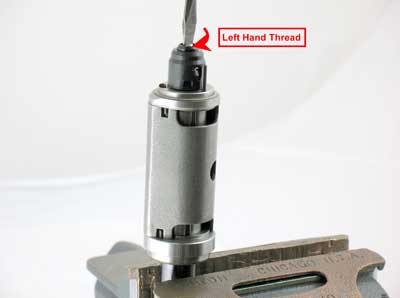
Step 3
Carefully fasten the work spindle in a vise with aluminum or bronze jaws so that the governor is pointing up. Use a flat-blade screwdriver to remove the governor. Left-hand thread,
turn clockwise.
Step 4
Fasten the 96209 Motor Collar around the cylinder, near the rear bearing plate. Position the motor and collar in the 96232 Arbor Press (#2). Use a 1/8" or 3 mm flat-end drive punch as a press tool to push the rotor out of the 02057 Bearing.
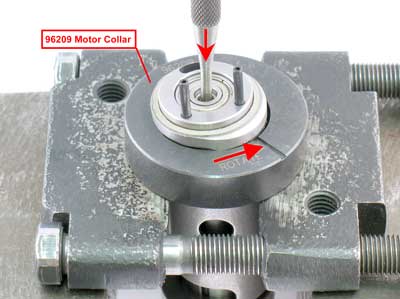
Rotate the motor collar to lock-in under the
rear bearing plate.
▲ Top of Page
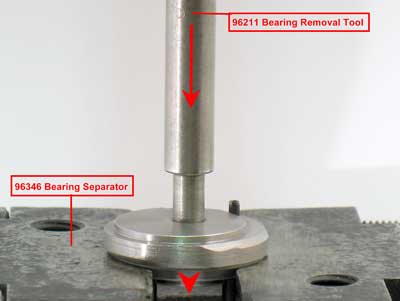
Step 5
Use the 96346 Bearing Separator (2"), the arbor press and the 96211 Bearing Removal Tool to remove the 02057 Bearing from the rear bearing plate.
Step 6
Fasten the rotor in the vise with aluminum or bronze jaws so that the work spindle is pointing up. Use an adjustable wrench to remove the collet body. Turn counterclockwise.

Step 7
By hand, use a press tool to remove the 54520 Bearing from the front bearing plate.
Remove the shims form the front
bearing plate.

Step 8
Remove the 51927 Spacer from the rotor.

Disassembly Complete
▲ Top of Page